Loading... Please wait...

- Home
- DIY Blog
- PAPERCRAFT
- Stamping 101
Stamping 101

DIY PROJECT:
Stamping with Clear Stamps 101
New to stamping or using clear stamps? This 101 will get you stamping in no time!
- Makes: Varies
- Skill Level: Beginner
- Time: 15 Minutes
-
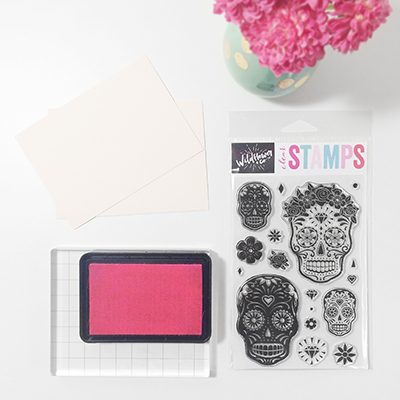
Scrap paper
Now Let's Get Messy!
-
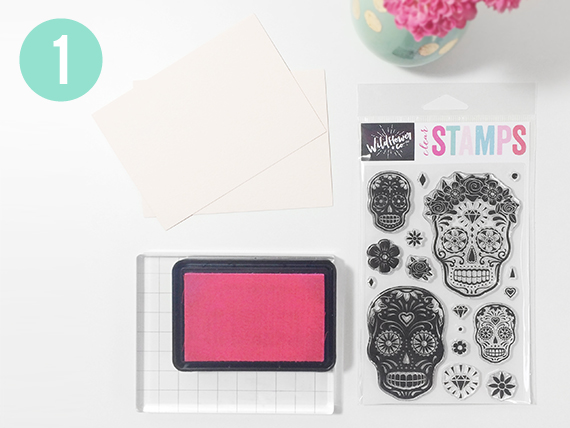
STEP 1: Plan your design. Choose which stamps you want to use, the ink pads, & where you want to stamp! Prepare & protect your work surface as inks can stain.
-

TIP: Choose the appropriate ink pad for the surface you are stamping on. Porous, uncoated paper is great paired with pigment ink, while coated papers, inc. velum, need a specially formulated ink as standard pigment inks may not dry or smear. Ink colors will look different depending on the color of the surface being stamped (i.e. lighter ink may not show on darker surfaces). It's ALWAYS a good idea to test ink on the intended surface before starting big projects!
-
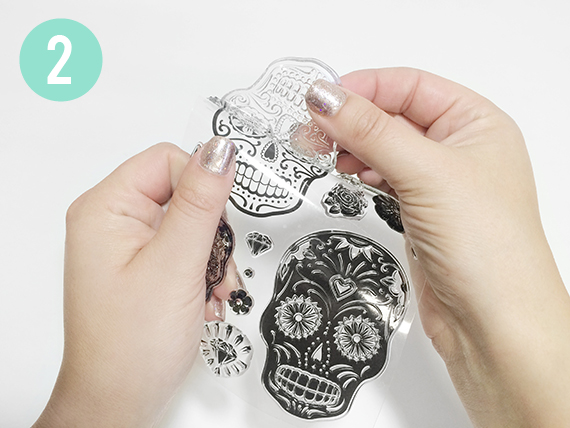
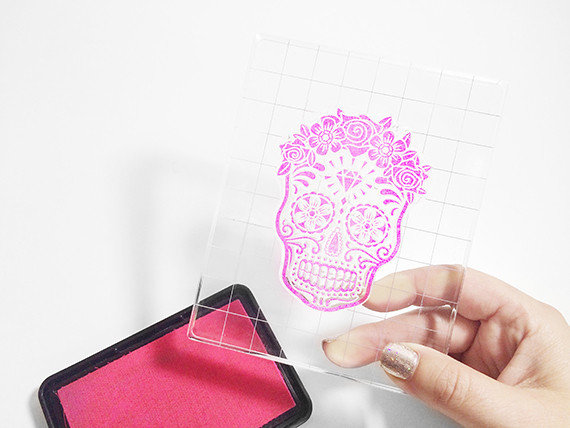
STEP 2: Time to place the clear stamp on the stamp block! For best results, choose a stamp block slightly larger than the stamp & consider one with alignment grids - they make positioning the stamp super easy. Ensure stamp & stamp block are clean & dry as any dirt or moisture will prevent a strong bond. Now gently peel the stamp off of the backing sheet & position the flat side onto the stamp block. Save backing sheet for stamp storage.
-
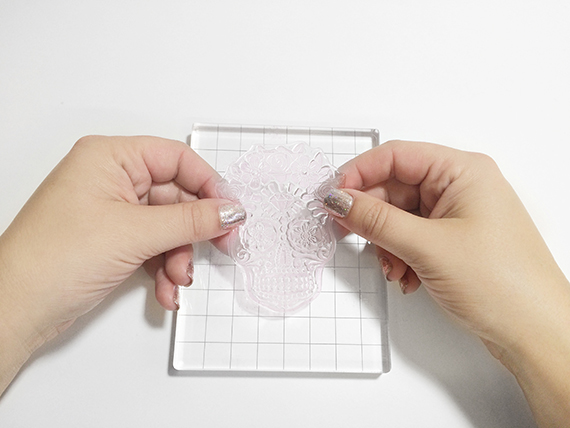
STEP 2 - CONTINUED: Stamps will cling to the block like magic!
-

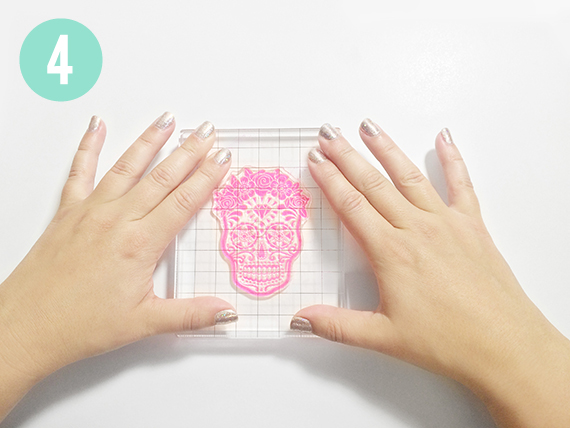
STEP 3: Ink your stamp by either: (1) pressing stamp straight down onto the ink pad or (2) dabbing the stamp design with the ink pad (this technique is especially useful with smaller ink pads). Try not to get ink on the stamp block as it can transfer to the surface you are stamping.
-
STEP 3 - CONTINUED: Ensure that stamp is fully covered with ink, but not oversaturated. With clear stamps it is easy to see the ink! If it looks spotty, just re-ink until you have complete coverage.
-
TIP: Practice stamping on scrap paper to get a feel for stamping & your new stamps. Stamp straight down & apply even pressure - do not wiggle the stamp as it will result in blurry images. Carefully lift the stamp straight back up while holding the stamped paper down (they may stick a little). This is a pretty quick motion - stamp straight down & lift straight back up. Try practicing until you get a feel for the technique & are happy with the results!
-
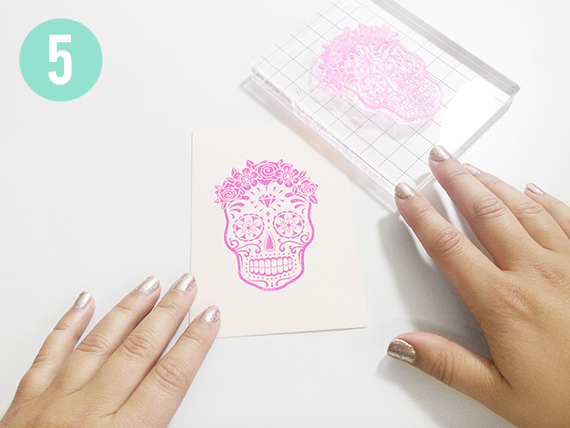
STEP 4: Now that you have mastered the basic stamping technique, it's show time! Position your inked stamp where you want to stamp & go for it! Clear stamps make it really easy to position stamps exactly where you want them!
-
STEP 5: Allow time to dry. Drying time varies depending on several factors including paper type, ink type, & your environment.
-
TIP: Care Instructions: When you are finished stamping or before changing ink colors, clean your stamps using soap & water or a water-based stamp cleaner. We like using a water based cleaner & a double sided scrubber pad. Spray one side of the scrubber pad with the cleaner & rub stamp until clean, then dry on the other side. Do not use a solvent based stamp cleaner, which can harm clear stamps. To store, gently peel stamps from the block & return to the backing sheet.


Leave a trail of glitter & show off your skills!
P.S. — It looks awesome ☺