Loading... Please wait...

- Home
- DIY Blog
- PAPERCRAFT
- Heat Embossing 101
Heat Embossing 101

DIY PROJECT:
Heat Embossing 101
You won’t believe your eyes when you see firsthand the magic of heat embossing! Making your own heat embossed stationery is super easy & looks ah-mazing!! It will only look like it cost a fortune!
- Makes: Varies
- Skill Level: Beginner
- Time: Approx. 15 minutes
-

A – Embossing Powder
B - Ink Pad – either embossing or pigment ink
C - Stamps
D - Acrylic Stamp Block (if using Clear Stamps)
Tools needed:
“Funnel” – fold a piece of paper in ½ to use as a funnel
Now Let's Get Messy!
-
STEP 1: Plan your design. Choose which stamps you want to use, the colors & where you want to place them! Prepare your work surface – you will need to work quickly, so it is important to have everything ready to go! Position your stamp on the acrylic block. If you are new to stamping, see our tutorial here!
-

TIP: Work with clean hands & try not to excessively handle the paper being stamped - embossing powder can stick to the natural, oil residue from your hands.
-
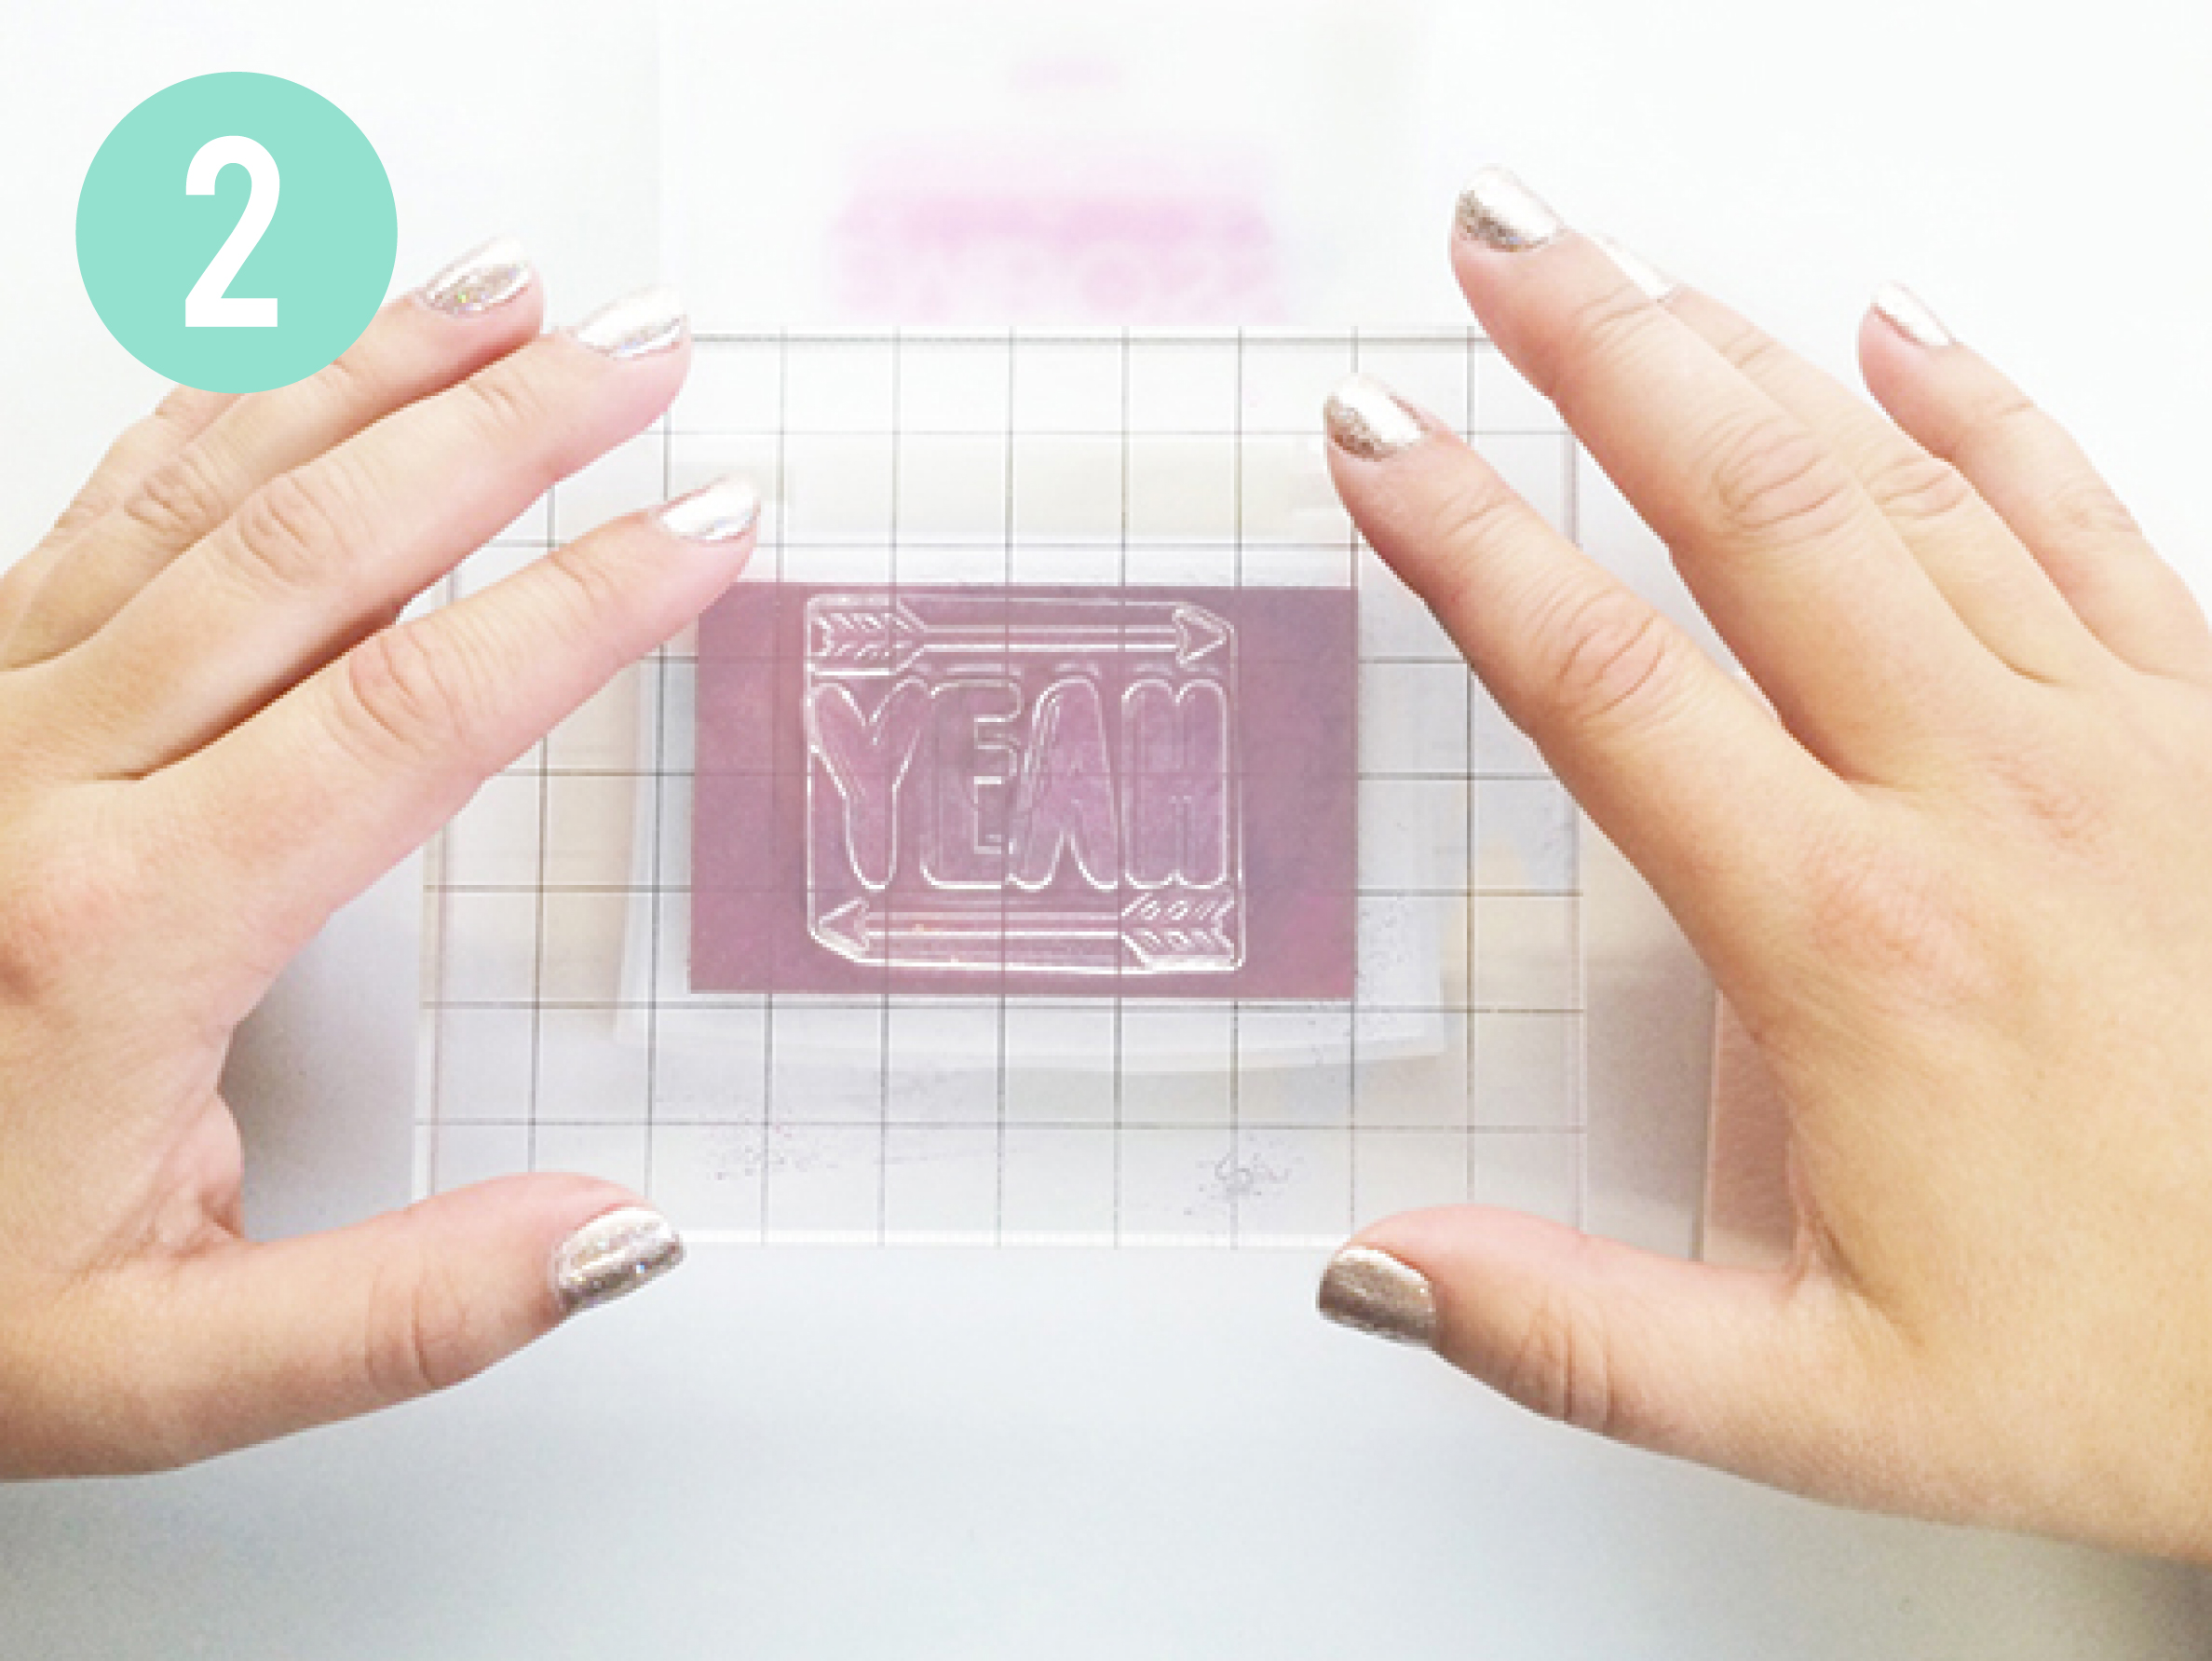
STEP 2: Ink your stamp - Firmly press stamp into the ink pad, ensuring full coverage of the stamp design.
-
STEP 3: Working quickly, stamp your paper. It is important to stamp straight down & do not wiggle the stamp. Save the wiggling for your happy dance when you finish this project!
-

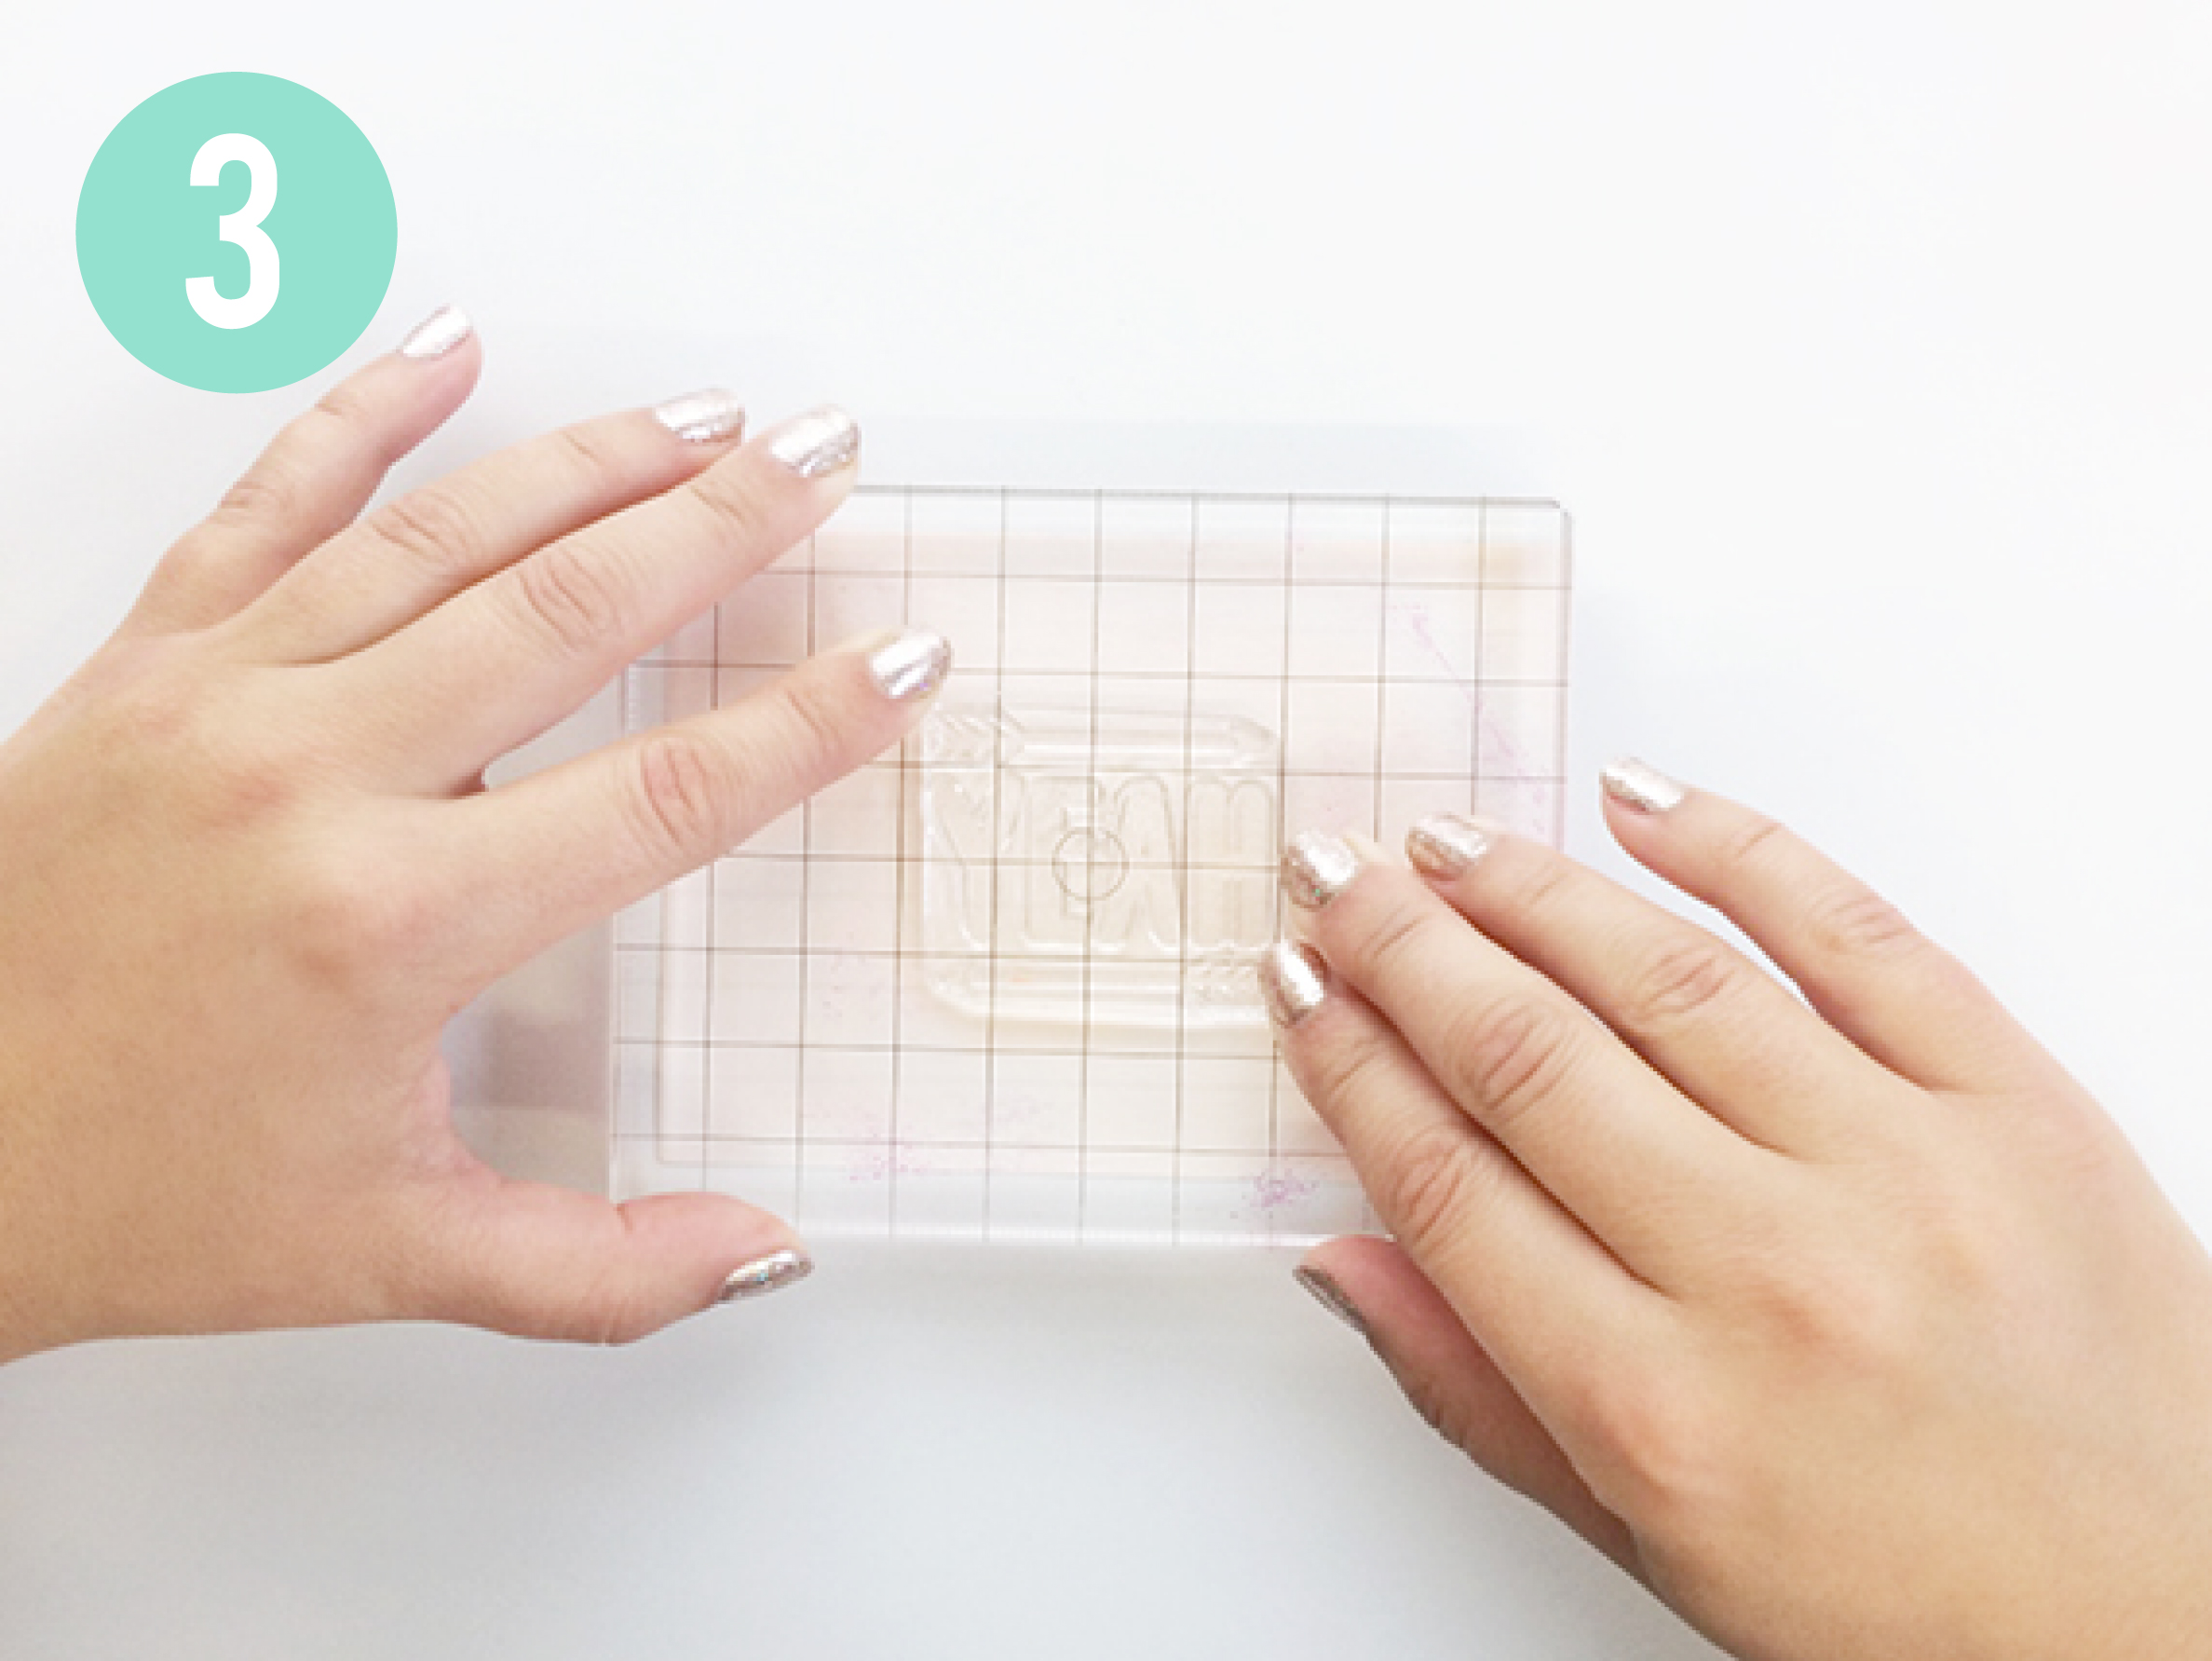
STEP 3 CONT.: If using an embossing ink, you will see a transparent image like this!
-
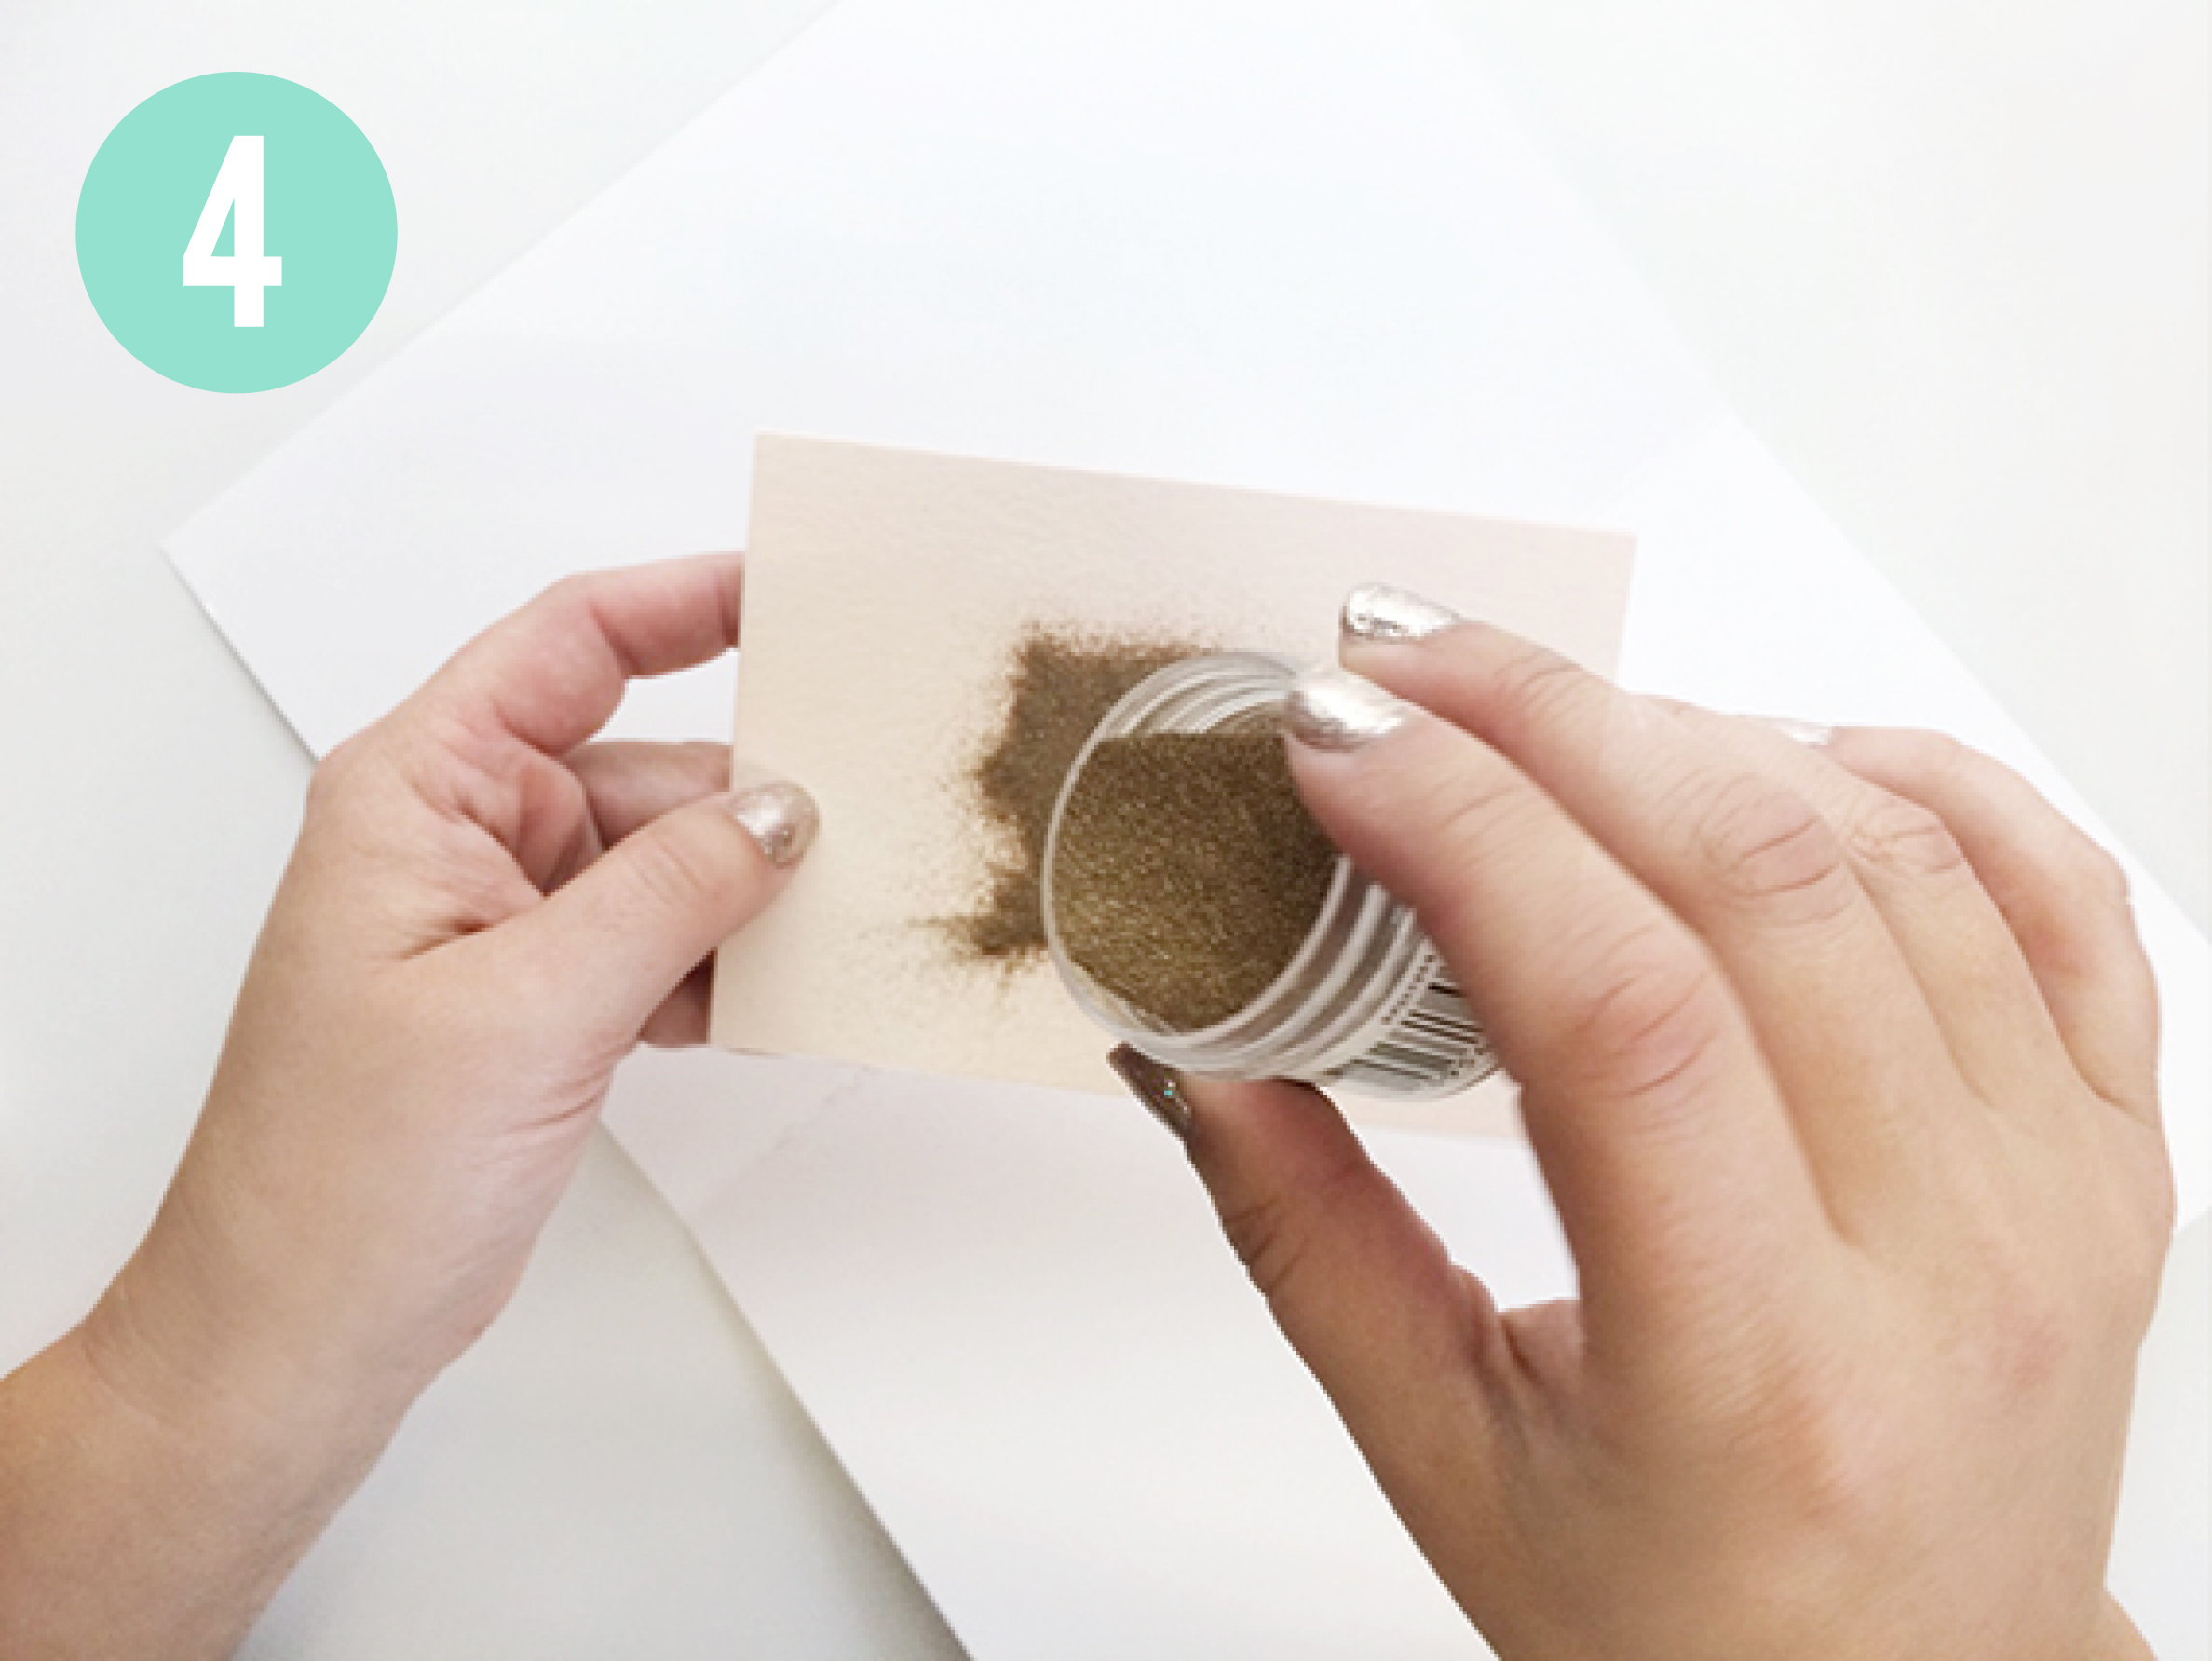
STEP 4: Working quickly, position the stamped object over the paper “funnel”. Generously cover the inked image with embossing powder, ensuring an even coat.
-

STEP 4 CONT.: Remove excess embossing powder by turning paper over & lightly tapping until the excess has been removed. If there is any stubborn powder, you can use a soft brush or cloth to gently brush away the excess. Pour excess embossing powder back into its container & save for the next use! You will see that you actually use very little embossing powder & that a little jar provides tons of bling!
-
STEP 5: Your stamped design should now look like this with all inked areas covered with embossing powder! If you notice any inked areas not fully covered, repeat step 4.
-
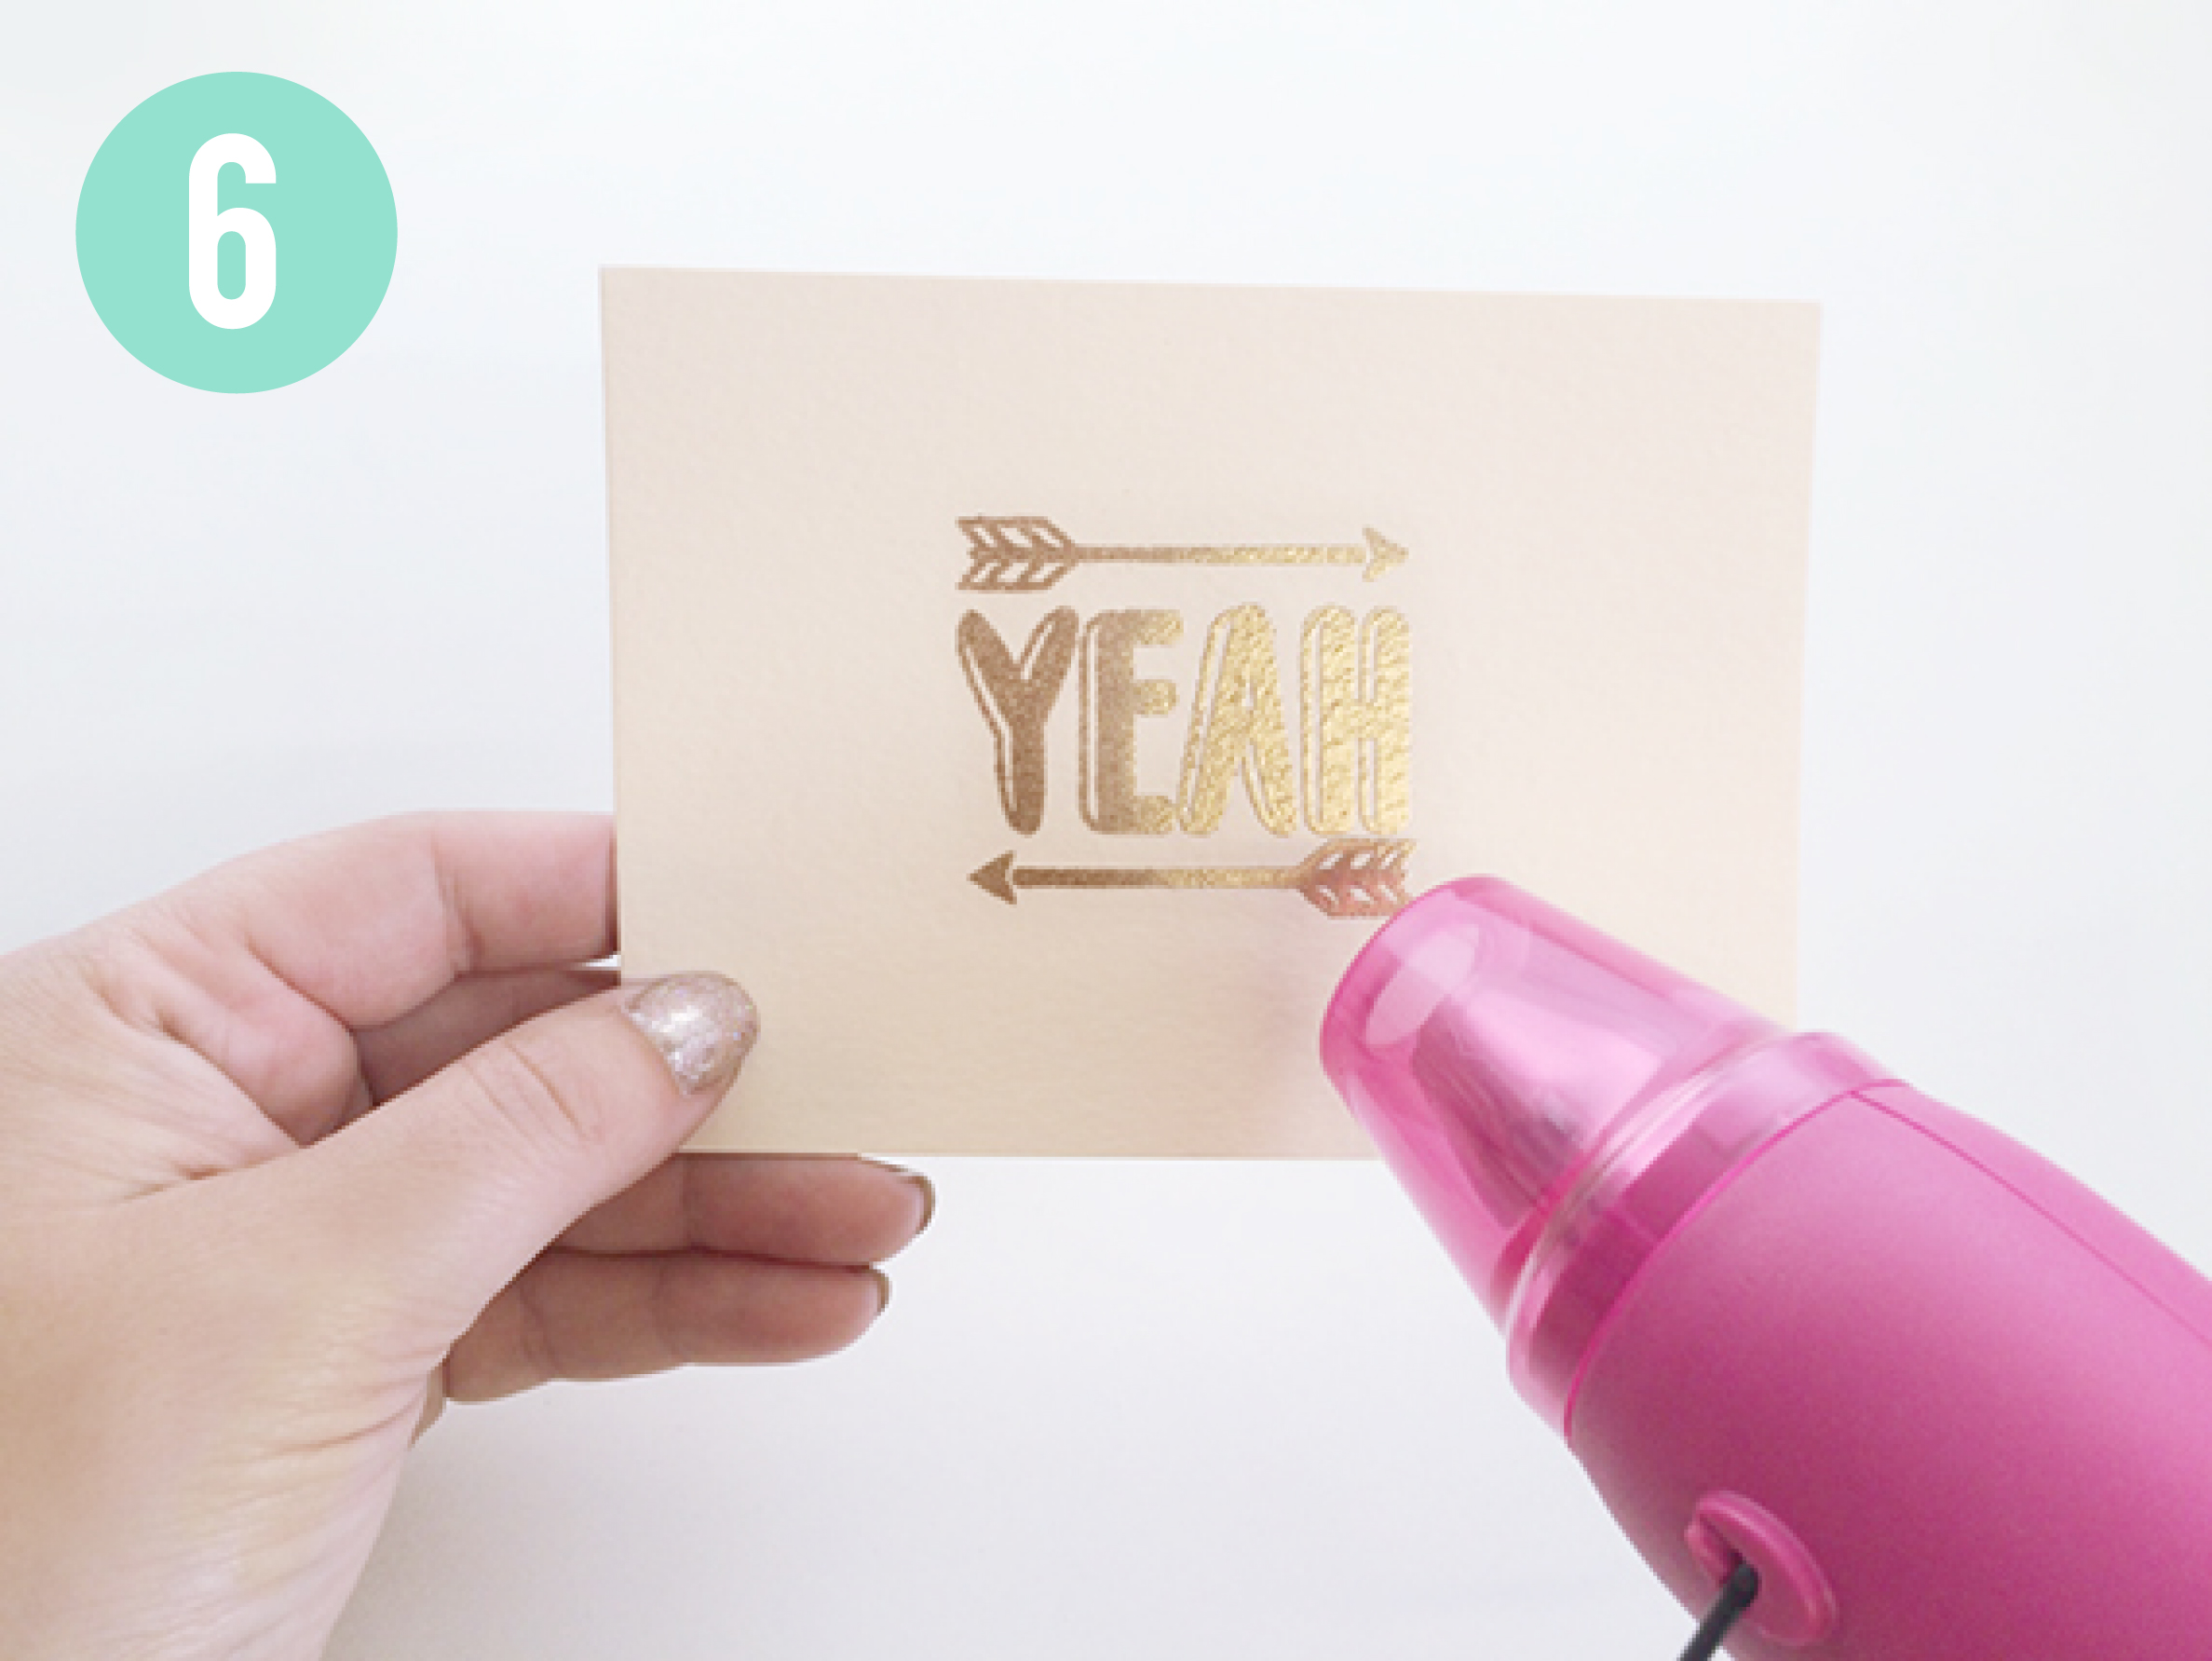
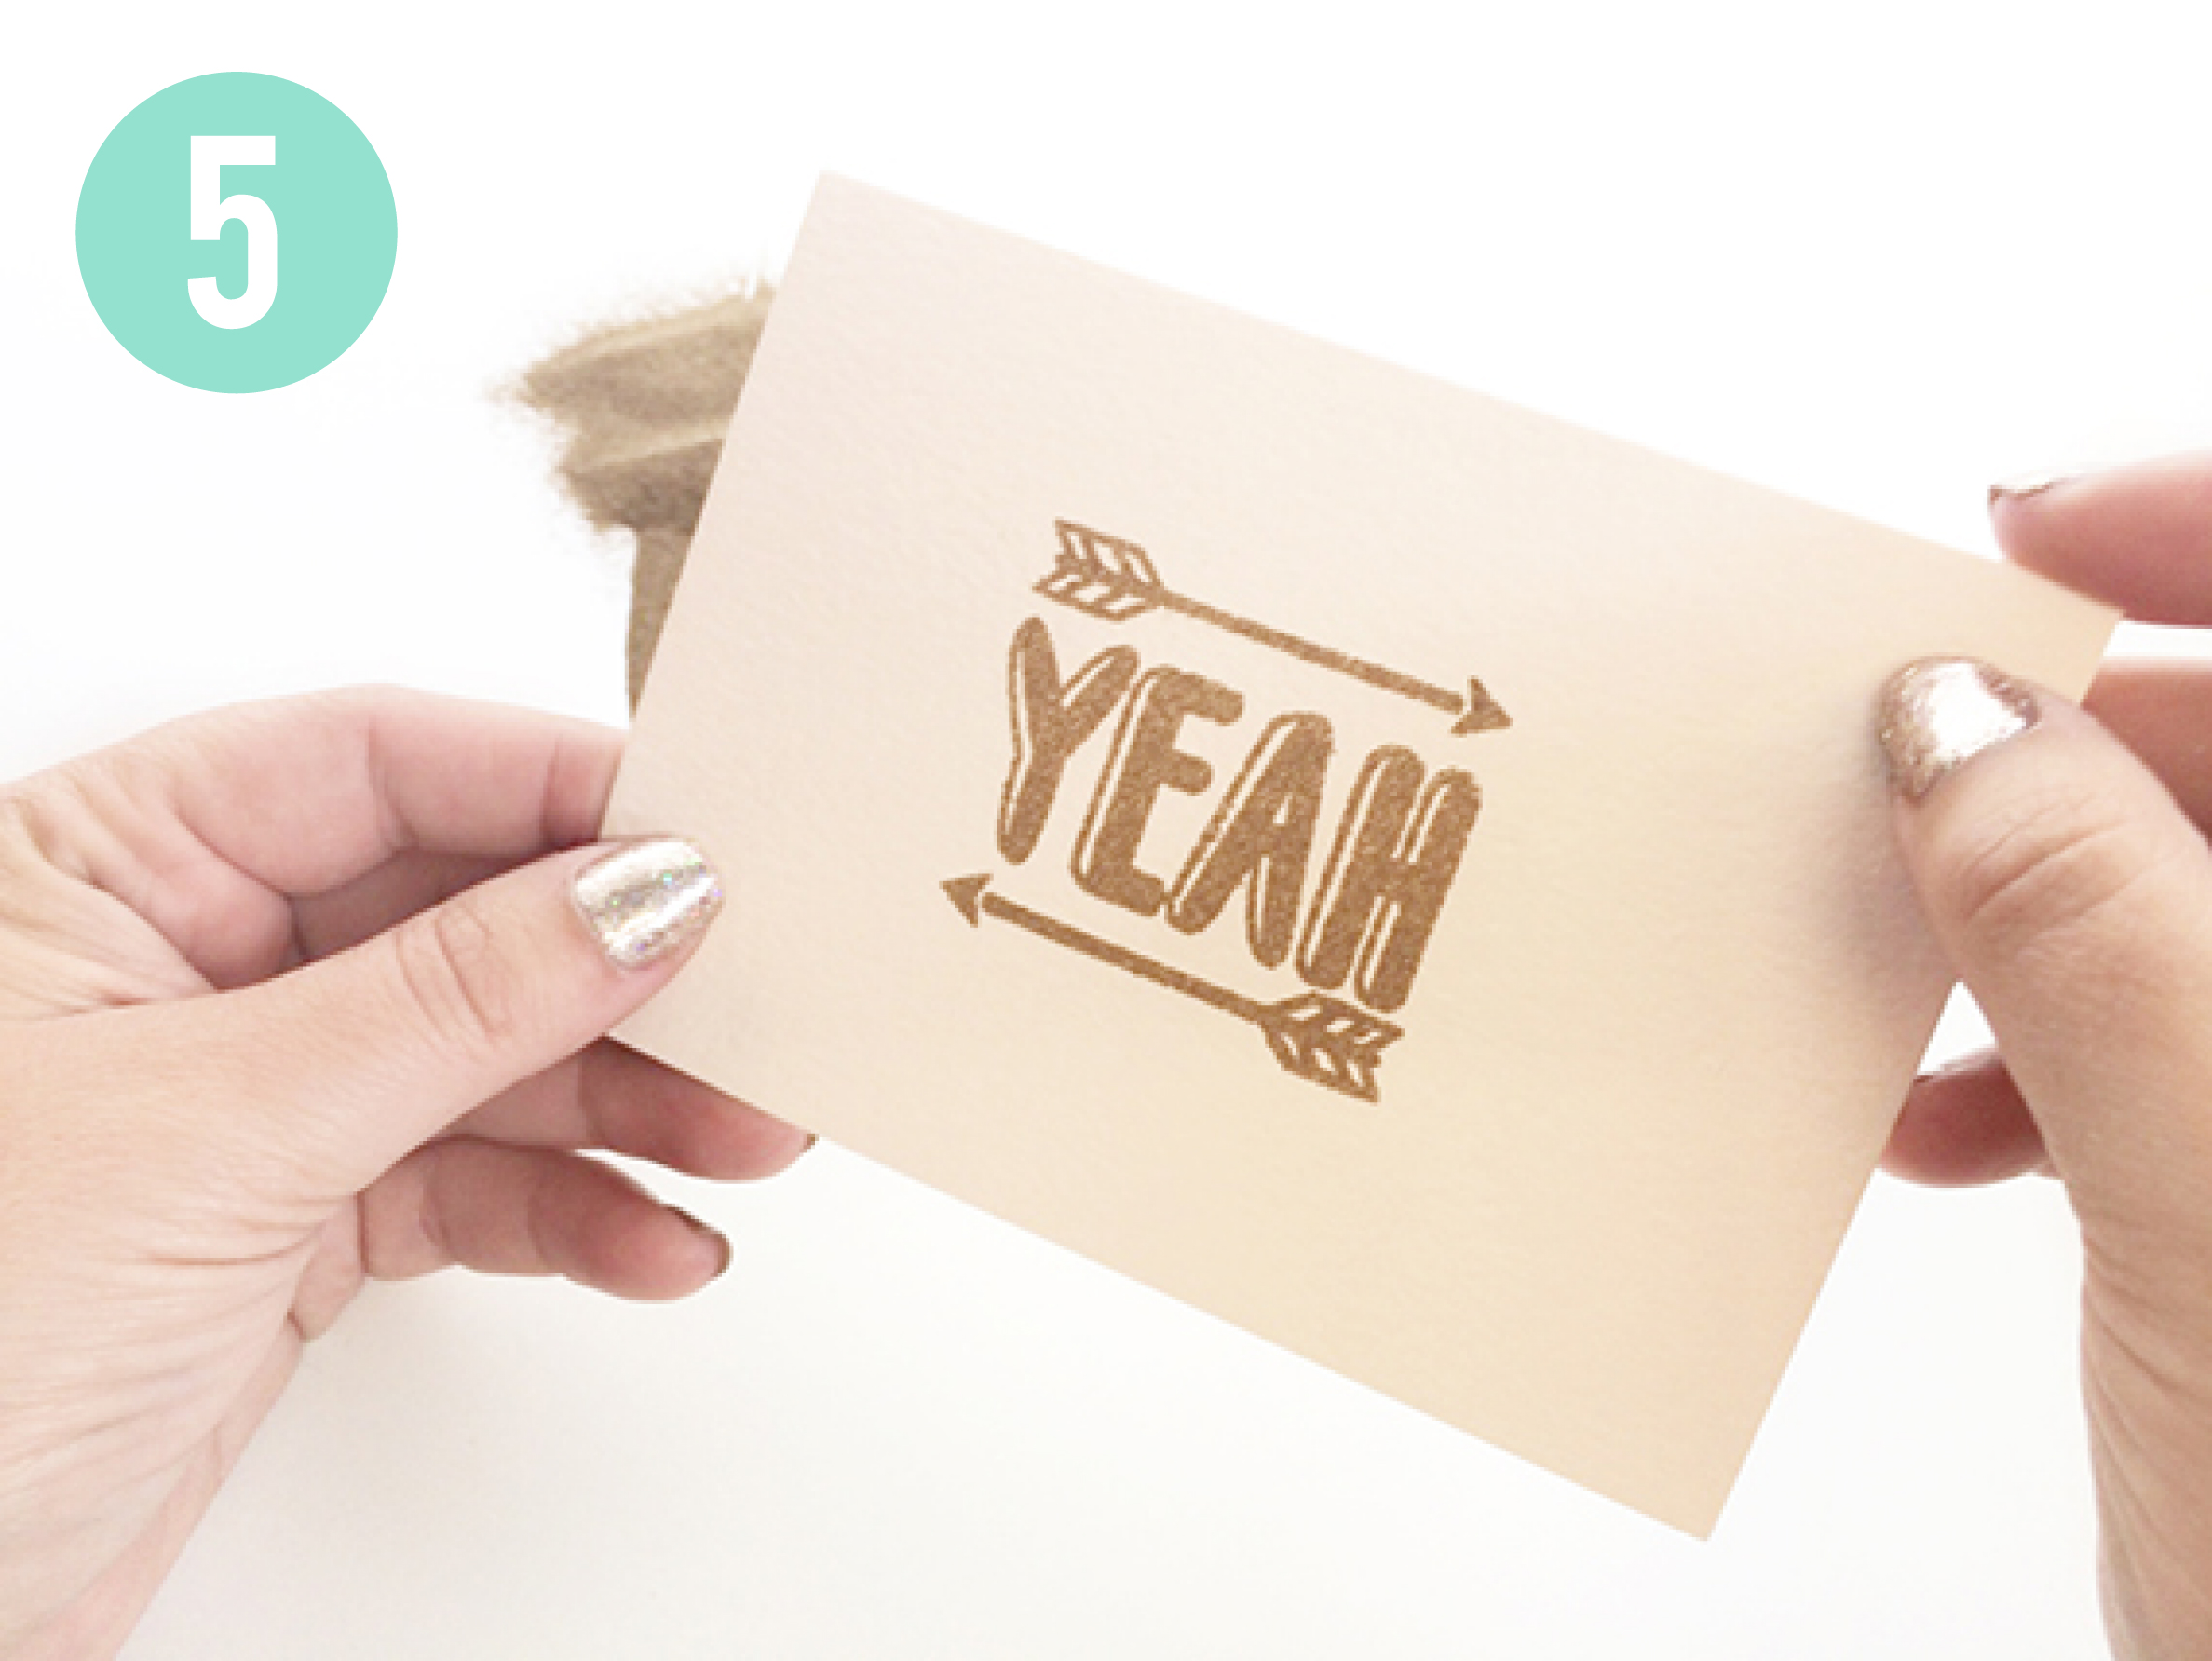
STEP 6: Heat Emboss – this is where the magic happens! Turn on your heat gun & let it warm up for a few seconds. Direct the heat onto the embossed image until the powder melts & becomes shiny! Once fully melted, remove from heat, turn-off & unplug the heat gun. Now let your embossed image dry for approx. 5 minutes while admiring just how awesome it looks! Ta da!!
-
TIP! Warning! Heat guns get very, very hot (650 degrees hot = ouch!). Always point the heat gun away from you as it can cause injury. Heat guns should not be used with adaptors & should only be used in the regions they were intended for. Let heat guns cool down in-between use to prevent overheating.


Leave a trail of glitter & show off your skills!
P.S. — It looks awesome ☺