Loading... Please wait...

DIY Charm Jewelry 101

DIY PROJECT:
DIY Charm Jewelry 101
Making your own charm jewelry is super-fast & easy! All you need to do is plan your design & learn to properly open & close jump rings using basic, chain nose jewelry pliers. Perfect for beginners!
- Makes: Varies
- Skill Level: Beginner
- Time: Approx 15 minutes
-

A – Charms
C - Jump Rings
Tools needed:2 Pairs of Jewelry Pliers, preferably Chain Nose Pliers
Other stuff needed:
N/A
Optional:
N/A
Now Let's Get Messy!
-
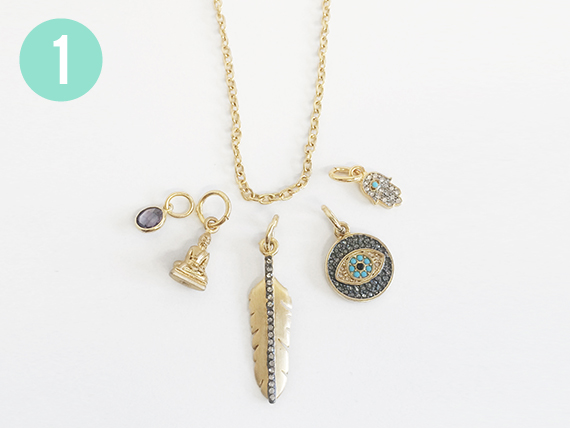
STEP 1: Plan your design. Decide on your charms & base necklace or bracelet. Play around to decide your favorite charm placement!
-
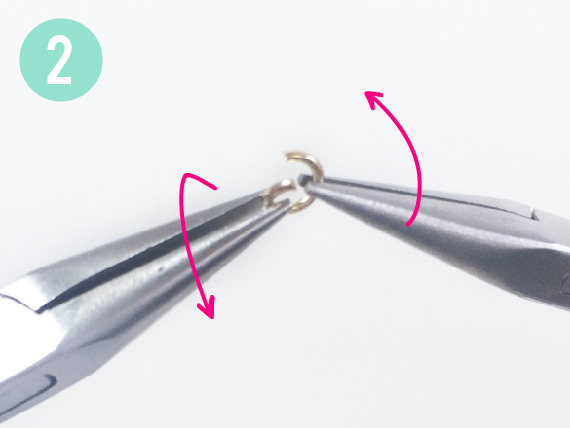
STEP 2: Time to open jump rings! Using pliers to hold the jump ring upright (opening pointing up), firmly grasp each side of the jump ring. Now gently twist both sides of the jump ring in opposite directions – 1 towards you & 1 away from you - until there is an opening large enough to fit your selected jewelry. This motion is like rolling your wrists away from each other. Take care not to not pull the jump rings apart in any other direction or else they will lose their shape & may not close properly.
-

STEP 2: Start getting comfortable with your jewelry pliers – they will be your new bestie & essential to all jewelry making! You may want to practice opening & closing a few jump rings to get the hang of it.
-
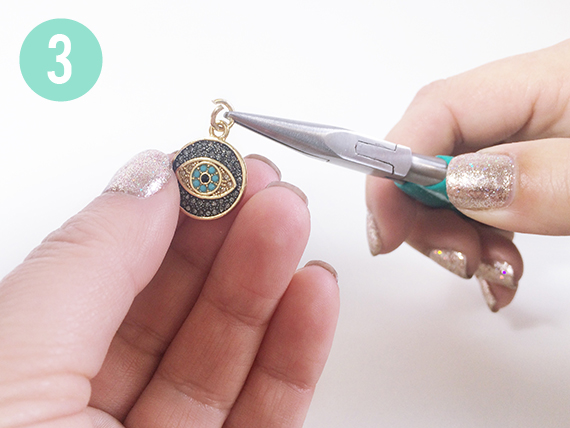
STEP 3: Attach charms - Slide jump ring onto your charm (if not already on) & attach to the desired spot on your necklace or bracelet.
-
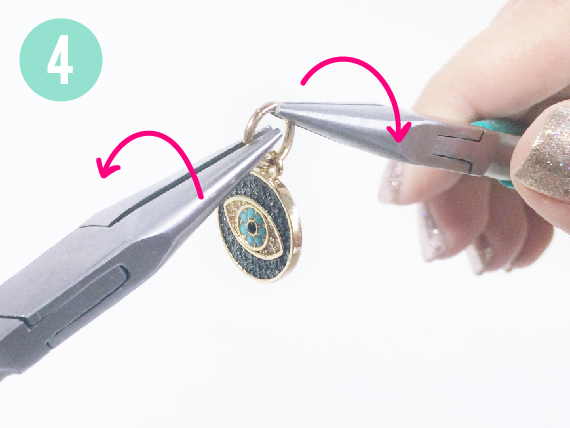
STEP 4: CClose jump rings - Now that the jump ring & charm are attached to your necklace or bracelet, reverse the motion from Step 2 to close the jump ring –gently twist both sides of the jump ring together until closed with no visible gap. If you still have a gap, just repeat the process, applying a bit of inwards pressure when you twist the jump rings shut. Be sure to really close the jump ring – you don’t want charms falling off!
-
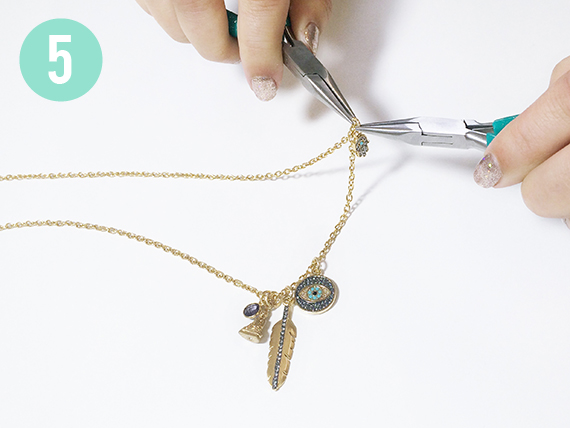
STEP 5: Repeat Steps 2-4 for all additional charms.


Leave a trail of glitter & show off your skills!
P.S. — It looks awesome ☺